
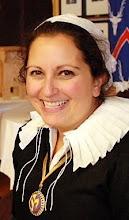
So, I'm waiting for supplies for my Jupiter piece to be finished. And my coif is done, and has been displayed, so now I need a new project.
The Mudthaw A&S theme is "All Things Spring". What jumped to mind was an Elizabethan sweet-bag: they're small, and pretty, and usually have flowers and bugs on them, and flowers and bugs are spring. Plus, they usually incorporate metal thread, and that's something I haven't worked with before, so it's a good opportunity to try something new.
I'm particularly curious to try the plaited braid stitch. I have a sneaky suspicion the learning curve might be a bit steep, but then it should go very smoothly.
Sunday, January 16, 2011

Monday, January 3, 2011
More Jupiter
I wanted to fill in the bottom two corners with Floral slips, based on extant Oxburgh Hangings, which predominantly feature plant slips in the corners of the uncut panels.
I was inspired to do a violet/viola after spotting one in a Hardwick Hall textile.
I'm happy with how it turned out, although I'm debating turning the flower a bit, so it's not so "squared" in the image.

I was inspired to do a violet/viola after spotting one in a Hardwick Hall textile.
I'm happy with how it turned out, although I'm debating turning the flower a bit, so it's not so "squared" in the image.

Monday, December 27, 2010
Jupiter update

Although, I did the panel in tent stitch, because that's what the V&A Museum website said. Then I spoke with Mistress Cellach, who said "No, those are all cross-stitch- the Museum hasn't updated the website." And sure enough, looking at the high res photo, it's clearly cross stitch- which was a valuable lesson for me: Look with My Own Eyes. Not that I doubt museum professionals- they have far more experience than I do, but in this case, the website didn't include all the relevant information.
So I now have this odd, cruciform panel. Reading through "Emblems for a Queen" by Michael Bath, I noticed some uncut panels, and I decided to incorporate corners into this panel, and turn it into a pillow, so it's of some use. I'm creating my own emblems for the corners- spiders for the top two, and flower slips for the bottom two. This mimics the corners of some of the existing panels. Although no panel includes spiders in the corners, panels do include butterflies and snails, and spiders are a completely legitimate 16th century embroidery motif (as well as being a part of my heraldry). However, I haven't noticed any uncut panels with "insects" in all four corners, so I will fill the bottom two panels with floral slips, which seem to be a reasonable accompaniment to the insect corners.
I plan to complete the corners in tent stitch- this will match the body, as well as serve as a reminder to Look with My Own Eyes.
Sunday, December 12, 2010
Finished Coif
Here is a pic of the finished coif on display:

I have a pdf of my documentation, available at: My Rutgers Site.
I'm very pleased with how it turned out, but I'm already thinking about the next one. I need to get my stem stitch satisfactory, and I'd like to work with Blackwork fills on the next coif, and possibly metal thread, or more smaller, silver spangles, for contrast.

I have a pdf of my documentation, available at: My Rutgers Site.
I'm very pleased with how it turned out, but I'm already thinking about the next one. I need to get my stem stitch satisfactory, and I'd like to work with Blackwork fills on the next coif, and possibly metal thread, or more smaller, silver spangles, for contrast.
Tuesday, October 12, 2010
Blackwork coif
Here's the "rough draft" of the coif:

I need to add size 9 gold spangles, and roll hem the edges.
I may possibly add some shading, and maybe a few more motifs, although Mistress Cellach has suggested that I add the spangles, and extend some vines, and then see where I am.
Some bulleted documentation:
1. Materials: Gutterman %100 spun silk thread, black; Size 10 steel sharps needle; 3.5 oz. %100 linen (approximately 48 count).
2. Techniques used: double running stitch, french knots, couching, speckle stitch.
3. Motifs: All motifs are tranferred from the 1632 edition of Richard Shorlayker's "A Schole-House for the Needle", except for the spider webs and spiders, which are a creation of the artist.
Procedure:
4. 1. I was inspired to create this coif after finding pictures of "A Schole-house for the Needle" online. Although this edition is dated to 1632, similar motifs are found on extant 16th century shifts housed in the Victoria and Albert's Museum.
5. 2. I drew out the design on paper first, the scrolling single-line recinaux taken from a late 16th century coif housed in the Antonio Ratti Textile Center, of the Metropolitan Museum of Art. I transferred the design using an archival ink pen and a lightbox. The use of ink to lay out embroidery designs is found on extant coifs, and at least one textile housed in the V&A, item T. 88-1925.
6. The stitches are taken from extant examples, including a forehead cloth worked in double running stitch, housed in the Ashmolean Museum, WA 1947.191.320.
7. If additonal motifs are needed to fill, I would like to use some from textile T. 88-1925 from the V&A Museum.
Bibliography:
Arnold, Janet. (2008). Patterns of Fashion 4: The cut and construction of linen shirts, smocks, neckwear, headwear, and accessories for men and women c. 1540-1660. London: MacMillan.
Brooks, Mary M. (2004). English Embroideries of the Sixteenth and Seventeenth Centuries in the collection of the Ashmolean Museum. London: Jonathan Horne Publications.
Nevinson, John L. (1938). Catalogue of English Domestic Embroidery of the Sixteenth and Seventeenth Centuries. London: His Majesty's Stationery Office.
Early English books Online: http://www.eebo.chadwyck.com

I need to add size 9 gold spangles, and roll hem the edges.
I may possibly add some shading, and maybe a few more motifs, although Mistress Cellach has suggested that I add the spangles, and extend some vines, and then see where I am.
Some bulleted documentation:
1. Materials: Gutterman %100 spun silk thread, black; Size 10 steel sharps needle; 3.5 oz. %100 linen (approximately 48 count).
2. Techniques used: double running stitch, french knots, couching, speckle stitch.
3. Motifs: All motifs are tranferred from the 1632 edition of Richard Shorlayker's "A Schole-House for the Needle", except for the spider webs and spiders, which are a creation of the artist.
Procedure:
4. 1. I was inspired to create this coif after finding pictures of "A Schole-house for the Needle" online. Although this edition is dated to 1632, similar motifs are found on extant 16th century shifts housed in the Victoria and Albert's Museum.
5. 2. I drew out the design on paper first, the scrolling single-line recinaux taken from a late 16th century coif housed in the Antonio Ratti Textile Center, of the Metropolitan Museum of Art. I transferred the design using an archival ink pen and a lightbox. The use of ink to lay out embroidery designs is found on extant coifs, and at least one textile housed in the V&A, item T. 88-1925.
6. The stitches are taken from extant examples, including a forehead cloth worked in double running stitch, housed in the Ashmolean Museum, WA 1947.191.320.
7. If additonal motifs are needed to fill, I would like to use some from textile T. 88-1925 from the V&A Museum.
Bibliography:
Arnold, Janet. (2008). Patterns of Fashion 4: The cut and construction of linen shirts, smocks, neckwear, headwear, and accessories for men and women c. 1540-1660. London: MacMillan.
Brooks, Mary M. (2004). English Embroideries of the Sixteenth and Seventeenth Centuries in the collection of the Ashmolean Museum. London: Jonathan Horne Publications.
Nevinson, John L. (1938). Catalogue of English Domestic Embroidery of the Sixteenth and Seventeenth Centuries. London: His Majesty's Stationery Office.
Early English books Online: http://www.eebo.chadwyck.com
Wednesday, August 18, 2010

Queen's Tea Favor
I was asked by my friend, Baroness Viennet de la Mar, to create a blackwork embroidery Queen's Tea Favor for Her Majesty Marguerite of the East for Pennsic XXXIX.
Materials:
100% silk satin (clearance from JoAnn Fabrics samples)
100% silk thread, black.
Size 11 sharp needle.
Some observations:
I waxed the thread because I wanted a very smooth finish, especially pulling through the tightly woven silk-satin. The images are taken from Richard Shorleyker's "A Schole-house for the Needle", 1632 edition, available at http://eebo.chadwyck.com/home.
Although the book edition is "out of period", the images are very similar to "in-period" examples available on extant shifts and shirts, so I felt comfortable using them.
I used a steel needle because I'm concerned about the width of the eye on punched bronze needles. I use tightly woven or very finely woven materials, and I'm concerned the eye will leave a hole too big for the material to "heal itself".
This picture is of the finished embroidery, but not the finished tissue packet. It was lined with black linen, and closed with a whip stitch.

Materials:
100% silk satin (clearance from JoAnn Fabrics samples)
100% silk thread, black.
Size 11 sharp needle.
Some observations:
I waxed the thread because I wanted a very smooth finish, especially pulling through the tightly woven silk-satin. The images are taken from Richard Shorleyker's "A Schole-house for the Needle", 1632 edition, available at http://eebo.chadwyck.com/home.
Although the book edition is "out of period", the images are very similar to "in-period" examples available on extant shifts and shirts, so I felt comfortable using them.
I used a steel needle because I'm concerned about the width of the eye on punched bronze needles. I use tightly woven or very finely woven materials, and I'm concerned the eye will leave a hole too big for the material to "heal itself".
This picture is of the finished embroidery, but not the finished tissue packet. It was lined with black linen, and closed with a whip stitch.

Change of Focus
I've been away from this blog for so long because I got discouraged working on the gown. I did the typical "oh my G-D, must finish this tonight to wear tomorrow!" and the fit was ill, and so upsetting I put it away and haven't revisited it since.
Combined with grad school, both spring and summer sessions, and I just haven't wanted to do it.
And then Pennsic came, and it was Good, and I realized that what I love is doing embroidery. I make clothing as historically as I can, but that's not what I want to spend huge amounts of time and focus on.
So I now have a renewed enthusiasm for embroidery, and that will be the focus from here on out, unless it's not. :D
Combined with grad school, both spring and summer sessions, and I just haven't wanted to do it.
And then Pennsic came, and it was Good, and I realized that what I love is doing embroidery. I make clothing as historically as I can, but that's not what I want to spend huge amounts of time and focus on.
So I now have a renewed enthusiasm for embroidery, and that will be the focus from here on out, unless it's not. :D
Friday, February 5, 2010
Washerwoman Hands
Wow, it's been a while since I updated! That's what grad school will do to one's blog. :)
I recently attended Birka, and wore my 16th German "Kampfrau" ensemble. (See new profile picture). I got stains on my apron! Apparently, the black wool I used for my guards and cuffs isn't colorproof! I had blue and pink stains from where my cuff would rest on my apron, after getting wet from washing my hands. (The dark blue was the contact point, and the pink the dye seperating out from that point).
Rather than just chuck the linen into the wash with some bleach, since chlorine bleach can yellow linen, I figured I would see what a more "hands-on" approach would do to the stains. Placing the apron under running water (even almost a week later) removed %90 of the stain. Some brief googling suggested white vinegar and salt soak, so that's happening now. If that doesn't work, I'm going to make a baking soda paste, and see how that does.
After holding my hands under hot running water, and salt and vinegar, it's no wonder washerwomen have a reptuation for terrible rough hands. I can only imagine what lye does to ones skin!
I recently attended Birka, and wore my 16th German "Kampfrau" ensemble. (See new profile picture). I got stains on my apron! Apparently, the black wool I used for my guards and cuffs isn't colorproof! I had blue and pink stains from where my cuff would rest on my apron, after getting wet from washing my hands. (The dark blue was the contact point, and the pink the dye seperating out from that point).
Rather than just chuck the linen into the wash with some bleach, since chlorine bleach can yellow linen, I figured I would see what a more "hands-on" approach would do to the stains. Placing the apron under running water (even almost a week later) removed %90 of the stain. Some brief googling suggested white vinegar and salt soak, so that's happening now. If that doesn't work, I'm going to make a baking soda paste, and see how that does.
After holding my hands under hot running water, and salt and vinegar, it's no wonder washerwomen have a reptuation for terrible rough hands. I can only imagine what lye does to ones skin!
Wednesday, January 13, 2010
Shift-y

Oh, I went back and removed the collar and ruffle, and gathered the shift neckline more, reattached and shortened the collar, and now the ruffle stands out much more on it's own.
That is a Good Thing, and it makes me happy, although I'm not smiling in this picture. :)
*The above picture also shows my paire of bodys from the side, so there is a clearer view of the boned tabs, and the silhouette it creates.
Subscribe to:
Posts (Atom)